In this project I will share with you Esp32-Cam based DIY Camera. It can taking photo after save in SD Card. Also it has photo count
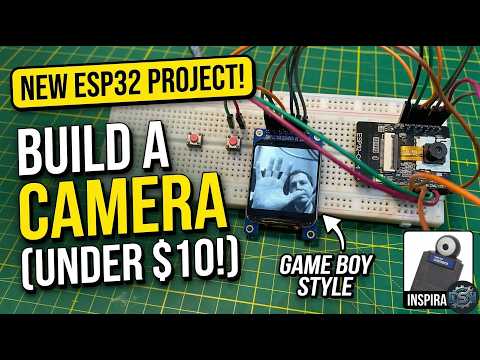
Build your own retro-style digital camera for under $10! This project transforms a simple ESP32-CAM into a portable, lo-fi camera inspired by the classic Game Boy Camera aesthetic. It features a grayscale live preview on an OLED screen and saves high-resolution photos directly to a microSD card.
Don't forget to Subscribe to the Channel and Like the video!
- 100% DIY & Low Cost: Built using affordable, off-the-shelf components.
- Retro Aesthetic: Monochrome live preview for a classic "Game Boy Camera" look.
- Photo Storage: Automatically saves captured images to a microSD card (formatted to FAT32).
- Persistent Counter: Remembers your photo count even after a reboot using EEPROM.
- Built-in Flash: Includes a toggleable flash for high-quality low-light captures.
- Portable Design: Integrated LiPo battery support for on-the-go photography.
The project uses I2C communication for the display to save precious GPIO pins for the SD card and shutter button.
| Component | Details | Note |
|---|---|---|
| Development Board | ESP32-CAM (AI-Thinker) | The core microcontroller and camera module. |
| Display | 0.96" SSD1306 OLED (I2C) | Provides the monochrome live preview and photo count. |
| Storage | MicroSD Card | Required: Must be formatted to FAT32. |
| Shutter | Tactile Pushbutton | Used to trigger the camera and save photos. |
| Power (Portable) | LiPo Battery & TP4056 | Includes a charger board and voltage booster (set to 5V). |
| Case | 3D Printed Enclosure | Custom design created in Fusion 360. |
- Install Libraries: Use the Arduino Library Manager to install:
Adafruit GFX&Adafruit SSD1306JPEGDecoderTFT_eSPI(Only if using the optional ST7789 color screen)
- Code Configuration:
- Choose the "DIY Camera" script from the repository.
- (Optional) Adjust the code to set your flash preference (ON/OFF).
- ESP32 Board Settings:
- Select AI Thinker ESP32-CAM as your board.
- Ensure the correct COM port is selected.
- Upload Mode:
- Short circuit GPIO 0 to GND and press Reset to enter boot mode.
- Click Upload in the Arduino IDE.
- Boot Up: Power the device; the display will show the live grayscale stream and photo count.
- Aim: Use the OLED screen as your viewfinder to frame your shot.
- Shoot: Press the shutter button. The flash will fire, and the screen will show a "Taking Photo" and "Saved" feedback.
- Review: Remove the SD card and plug it into your PC to view your retro-style photos.
- 3D Models (STL/CAD): Available on my Cults3D Page
- Custom Design Services: Reach out on Fiverr
- Maze Escape: Google Play Store
- Air Hockey: Google Play Store
- Click Challenge: Google Play Store
- SkyScrapper: Google Play Store
- Flying Triangels: Google Play Store